
Choosing an FRP memento involves more than selecting a shape and adding a logo. You need to match the material to the occasion, specify the construction and finish, approve a production sample, and protect the finished pieces through delivery and display.
Key takeaways
- Match compact mementos to recognition and reinforced installations to public events.
- Specify dimensions, structure, finish, colours, logo placement, and mounting before production.
- Approve artwork and a physical prototype before confirming quantities and deadlines.
- Inspect finish and packaging before releasing FRP pieces for transport or display.
Choose the Right FRP Memento for the Occasion
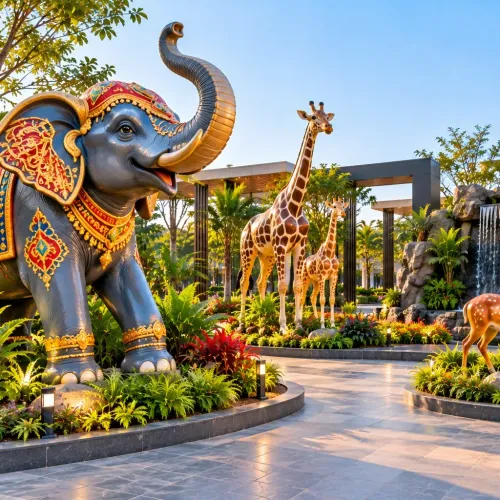
Match the form to the moment: use a compact, handable piece for recognition, a branded centrepiece for a celebration, and a reinforced installation for a public event. FRP suits sculptural logos, figurines, replicas, and unusual silhouettes that are difficult to produce in flat metal, wood, or acrylic.
| Occasion | Suitable FRP format | Selection check |
|---|---|---|
| Corporate awards | Individual trophy, plaque, or desk sculpture | Keep it stable, easy to carry, and large enough for the recipient’s name and award category |
| Company celebration | Branded centrepiece, anniversary number, mascot, or commemorative figurine | Match the company colours and allow repeated handling during photographs |
| Public event | Oversized logo, product replica, landmark model, or entrance installation | Specify a weighted base, internal reinforcement, weather protection, and safe edges |
Choose trophies and plaques when recipients need a practical keepsake; choose a sculptural form when the object must communicate a campaign, milestone, or identity. FRP mementos provide more freedom than standard acrylic or metal, but painted surfaces and projecting parts need careful handling.
Large shells should not be treated as solid castings. Ask for ribs, tubes, plates, or another internal support plus a weighted base; otherwise a tall piece can flex, crack at fixings, or tip during stage handling.
For an outdoor or semi-outdoor display, require exterior-grade paint or pigment and a compatible UV-resistant clear coat. For an exhibition hall, hotel, mall, or other enclosed venue, request the venue’s fire-performance requirement and supporting test documentation; FRP is not automatically fire-retardant.
Specify the Shape, Structure, Finish, and Branding
Before approving a custom FRP design, define its dimensions, load, internal support, surface standard, assembly method, and branding specification in writing. A sketch alone will not prevent a top-heavy award from tipping or a plaque from being fitted crookedly.
1. Record the overall height, width, depth, wall thickness, base footprint, centre of gravity, and maximum permitted weight. State whether the FRP construction is a hollow shell or solid form, and add ribs, a tube, plate, or weighted base where the piece will be tall or top-heavy.
2. Specify the material build-up: fibreglass reinforcement type and layer count, resin type such as polyester, vinyl ester, or epoxy, and the resin and gelcoat colour. Ask for the intended joint design, insert locations, screw points, base fitting, and plaque recess before fabrication begins.
3. Define the finish by naming a colour reference, gloss level, edge radius, parting-line tolerance, and acceptable limits for pinholes, sanding marks, filler marks, and brush texture. State whether the piece needs an exterior-grade paint system and UV-resistant clear coat; indoor FRP is not automatically weatherproof.
4. Approve logo application methods separately: painted graphics, vinyl film, printed transfer, engraved plaque, raised lettering, or embedded elements. Confirm logo size, orientation, placement, colour references, and bonding method.
5. For exhibition halls, hotels, malls, or other enclosed public venues, request the applicable fire-performance requirement and supporting test documents. Do not assume glass-and-resin construction is fire-retardant. Require a finished sample to check alignment, joint strength, base stability, and handling before releasing the batch.
Plan Artwork, Prototypes, Quantities, Cost, and Deadlines
A single FRP prototype and a 500-piece order are not priced the same way. For one piece, pattern-making and mould preparation can cost more than the resin and glass; for a batch, that tooling cost is spread across each unit.
Build the schedule backward from the event date, including approval and curing days:
- Approve the artwork, dimensions, logo placement, and 3D design approval.
- Create the master pattern and mould for the required FRP moulding.
- Produce an FRP prototype and approve its colour, finish, joints, and base.
- Allow time for corrections, resin curing, repeat fabrication, assembly, inspection, and protective packing.
Ask SHUBH AD'S Pvt Ltd, or any fabricator, to show these stages and dates separately rather than quoting only an FRP production lead time.
Compare quotations using the same specification:
| Option | Cost basis | Main timing and risk |
|---|---|---|
| One piece | Pattern, mould, finishing, decoration, packing, plus fabrication | Tooling dominates; a low unit price can hide setup charges |
| Short batch | Shared mould and pattern cost, plus per-piece production | First-article approval prevents repeating a defect |
| Large batch | Tooling spread over many units, with assembly and inspection rates | Confirm material availability, curing capacity, and replacement allowance |
Require the quote to state taxes, artwork revisions, transport, packing, installation, and the charge for extra or rejected pieces. Do not approve “recyclable” claims unless the resin system and end-of-life route are identified.
Check Durability, Safety, and Finish Before Release
Accept the piece only after a production sample passes an FRP quality checklist under the conditions it will face: indoor display, one-day outdoor use, repeated outdoor use, or permanent installation.
1. Examine the shell, edges, corners, and mould lines for pinholes, blisters, resin-rich patches, cracks, sharp fibreglass strands, and soft spots. Press the base and any internal support; flexing, rocking, or creaking signals weak construction.
2. Test every interface, because failures usually occur where parts meet. Pull lightly on inserts, plaques, handles, and fitted components; check screw points for cracks, confirm the base sits flat, and verify that the logo and text face the correct direction.
3. View painted and metallic surfaces in the venue’s actual lighting. Look for colour variation, fingerprints, spray-direction marks, runs, dust, exposed edges, and plaque gaps. Approve a UV-resistant FRP finish for outdoor use, and check that the clear coat is even rather than assuming FRP is weatherproof.
4. Simulate handling and transport: lift the piece by its intended grip, place it down repeatedly, and inspect the finish afterward. For Nagpur installations, assess heat inside a vehicle, dust, monsoon humidity, and outdoor exposure as separate risks; each can reveal a different defect.
5. Request the venue’s fire performance requirement before release. FRP is not inherently fire-retardant, so obtain the resin or coating test documentation the exhibition hall, hotel, mall, or enclosed venue requires.
Reject items with structural cracks, loose joints, unstable bases, or undocumented fire claims. Record approved colours, dimensions, finish, and sample photographs before accepting the batch.
Pack, Transport, Store, and Maintain FRP Pieces
A cracked base often starts before the event: a hollow award shifts inside a loose carton, then flexes at its fixing points. Use FRP packaging that immobilises the piece, supports its base, and leaves no pressure on thin projections; never let bubble wrap or foam bear directly against a sharp edge.
For large hollow FRP pieces, specify an internal rib or tube and a weighted base before dispatch. These supports stop flexing and tipping during loading, stage movement, and repeated handling. Carry tall pieces upright with two people, keep them strapped rather than compressed, and do not stack cases on top.
- Wrap painted surfaces in clean, non-abrasive foam or soft tissue.
- Place the piece in a rigid labelled crate or double-wall carton with edge clearance.
- Photograph the packed item and record its orientation before handover.
- Keep it away from direct sun, rain, and hot vehicle interiors during FRP transport.
- At the venue, lift from the base or designated support, not from a protruding ornament.
Store the memento upright on a level padded shelf, away from damp walls and solvents. For outdoor use, confirm the exterior paint and UV-resistant clear coat; FRP alone does not prevent fading, chalking, or microcracks.
Use mild soapy water and a soft cloth for FRP cleaning and repair checks. Avoid abrasive pads and aggressive solvents; repair any loose fixing or chipped coating before the next display.
Frequently asked questions
How do you choose an FRP memento for an occasion?
Use a compact, handable piece for recognition, a branded centrepiece for celebrations, and a reinforced installation for public events.
What details should you specify before ordering custom FRP pieces?
Define the shape, dimensions, internal structure, surface finish, colours, branding, logo placement, and mounting method.
How can you control artwork, quantities, cost, and deadlines?
Approve the artwork and prototype first, then confirm quantities, production requirements, budget, and delivery date.
What should you check before releasing FRP mementos?
Inspect the durability, safety, surface finish, branding, packaging, and transport protection before release.